It’s the App feature you’ve been waiting for! HazardCo Task Analysis has now landed!
A simple and easy to repeat approach, where you can:
- Simply complete Task Analysis from any mobile device
- Complete them on-site, in real-time at the touch of a button
- Keep the team informed by emailing your Task Analysis to everyone involved
Manage subbies? You can even digitally collect TA’s from subcontractors without the fuss!
What is a Task Analysis?
A Task Analysis is a hazard management tool that helps you identify hazards and the appropriate controls before you carry out a specific task or job. Completing a Task Analysis will help reduce the risks on-site by walking you through assessing the work before you start and putting the correct processes in place to make sure you do it safely.
How does it work?
The HazardCo App makes it simple for you to understand what you need to fill in. With an easy-to-use guide that gives you options to choose from.
- An identification of the work on-site
- Specific hazards relating to the work
- A description of the measures to be implemented to control the risks
- The order of work (method statement) showing the tasks that will be carried out in a step-by-step process.
All workers involved in the work should discuss the Task Analysis so they understand exactly what work is being done, how it will be completed, and the controls that will be used to keep everyone safe. It’s fundamental and should be done before any high-risk work gets underway.
What’s the benefit of having Task Analysis’ available in the app?
Task Analysis in the app are faster, simpler and repeatable.
The Task Analysis template on the App guides you through a step-by-step set up process. It gives you the confidence that the potential hazards have been thought through, and that you are putting the right controls in place to make sure everyone is safe.
All you need to do is choose the controls relevant to the work you are doing and hit SAVE, easy as that! A HazardCo Task Analysis is created, emailed to you and saved securely in your App and Hub so you can easily share it with the main contractors who need it.
If you have any questions reach out to the HazardCo team today
Taking care of your mental health is a difficult task. Sometimes you don’t even know you’re struggling until you are in the thick of it. Struggling with mental health can look different for everyone and the cause of it can be different for everyone. In the same way, dealing with or managing mental health looks different for us all. Even though we all respond to mental health differently, there are some common signs to look out for that we are struggling. There are also some commonly recommended things we can do to improve or manage our mental health.
Here are some common signs that you may be struggling:
- Difficulty sleeping or sleeping too much
- Feeling sad or down
- Not enjoying things you usually would
- Changes in eating habits
- Feeling anxious or worried constantly
- Mood swings
- Excessive drinking, taking drugs or violence
These feelings and behaviours can be onset by a variety of life events or stressors. There can be many life events that can impact our mental health such as; work-related stress, relationship troubles, finances, loss of a loved one, and many more. If we have been through a tough time or are aware that we aren’t feeling quite right there are some tools we can use that can improve our mental health. Using these tools to proactively manage our mental health is a great idea but it is also useful if you are currently struggling with your mental health.
Here are some common things people do to take care of mental health:
- Connect with people – Family, Friends, Workmates, Team Mates
- Be Active – Go for a walk or to the gym. Get out in nature
- Prioritise Sleep – Sleep has a big impact on mental health
- Talk to people you trust – Sharing the good and bad in life helps build a trusted community and support group around you.
- Take a break – Schedule in time to rest, recover or energise yourself. Find what helps make you feel like yourself.
- Eat well – A healthy diet and staying hydrated can help mental wellbeing
These tools and many more can all help you take care of your mental health. If you notice a friend is struggling or going through some tough life events, reach out to them and see how they are going. They could benefit from some of these tools or at very least a friend. Remember that taking care of yourself mentally is hard and you don’t need to do it on your own. Reach out to your family and friends or a doctor to talk about your mental health. If you are struggling there is help out there, below is a list of some places you can call if you need support.
Is work affecting your mental health? Is work affecting your worker’s mental health?
Have you thought about how to manage it? Did you know you have a duty to manage the risks that work poses to mental health?
We all know that work can affect your physical health. There are risks and hazards on-site that can cause you harm like slips, trips, and falls, hazardous substances, dust and so many more. Working can also impact your mental health in more ways than one. Here is a list of some common workplace hazards that can affect a worker’s mental health:
- Financial Pressure
- Lack of work
- Too much work
- Long hours and fatigue
- Workplace bullying or harassment
- Increasing costs of materials
- Projects not going to plan
There are many things at work that can impact mental health. Sustained exposure to workplace stressors increases the likelihood of poor mental and physical health. Businesses have a duty to manage the risks that work has to mental health. If the risks can’t be eliminated they should be minimised.
Businesses should try to prevent mental health harm at its source. Identifying risks and controlling them should be done by communicating with workers about what workplace conditions are harming their mental health. Things like low job control, low support, poor environmental conditions, exposure to injury or harassment can increase the likelihood of mental harm. Businesses should look to create workplaces that remove exposure to stressors, such as:
- make sure people understand their role
- increase workers’ ability to make their own decisions about their work
- offer a good balance between effort and reward
- take a long-term view of productivity
- focus on retaining staff
- promoting work-life balance.
- no tolerance to workplace bullying
Start managing mental health at work today. Have a toolbox meeting to discuss the common issues that impact your workers mental health. Discuss ways to eliminate or minimise these risks. It’s good practice to keep records of your meetings, this can be done in the HazardCo App.
If you have any questions get in touch with the HazardCo Team today
Disclaimer: This article discusses suicide and mental health
Last Thursday was World Suicide Prevention Day, and next week from the 21st-27th September is New Zealand Mental Health Awareness Week, so we thought we would share some insights into this important issue.
In 2019, New Zealand reported our highest number of suicide deaths to date, with a confronting figure of 685 cases. According to the Suicide Mortality Review Committee, construction has the highest suicide rate of all industries in New Zealand, at 6.9%. It is time that we recognised this issue, and understand the small, yet powerful steps that we can take to make sure our mates are ok, which can prevent the tragic effect on the lives of so many Kiwi families.
MATES in Construction is a community-based programme that promotes the building and strengthening of communities in the workplace and across the construction industry – helping Kiwi’s to provide an environment that encourages positive wellbeing.
MATES in Construction has three key focus areas to work towards their vision of significantly improving mental wellness and reducing suicide in the construction industry:
- To advance mental health and social services in New Zealand by promoting the prevention and control of mental illness for people engaged in the construction industry.
- Providing leadership for our people to gain better access to mental health services.
- Building a stronger, more resilient workforce.
The key message is about taking time out of your day to remind each other to notice when our mates may be struggling, and that it’s not only OK to have these conversations, but it’s essential.
Due to the current COVID19 climate, individuals may be struggling with financial stress, anxiety levels, and a lack of social interaction – factors that hugely affect our mental health and overall wellbeing. Therefore, it is so important that we support our friends and coworkers by taking 10 seconds out of our day to start these conversations.
It can be as simple as asking “Are you ok?”, “What’s happening in your world?” or “You don’t seem yourself, is anything up?”. You don’t need to be a counsellor, but taking the time to check-in is a clear indicator to everyone that you care, and that they matter – and this can make a big difference.
For more information, you can check out these resources below:
Mates in Construction
Boss Burnout – Spot the warning signs in yourself
Mental Health Foundation
Mates in Construction has a 24/7 helpline which you can call on 0800 111 315. Alternatively, you can seek additional assistance from an Employee Assistance Programme (EAP), your local GP or your whanau and friends.
We want to make sure that you have everything you need to work safely in a COVID-19 world. With this in mind, ensure you complete a COVID Task Analysis (you can use this as your COVID-19 Plan) and make sure you share it with your team before turning up to site.
Download yours below, which includes our advice on how to operate on-site safely:
A COVID Task Analysis is a simple and effective tool that helps you identify COVID hazards, risks, and the appropriate controls. All workers involved should discuss the Task Analysis so they understand the controls that will be put in place to minimise the risk of COVID on-site.
It’s important to us that you’re healthy and safe during this time, so get in touch if you’d like to chat about how HazardCo can support you, you can give us a call on 0800 555 339 or email info@hazardco.com.
What is Hi-Vis?
Hi-Vis is a form of Personal Protection Equipment (PPE) designed to minimise the risk of personal injury by making the wearers visible.
The New Zealand legislation has standards around the criteria that hi-vis needs to meet, the types available, and when they should be worn.
As a business owner, you must manage the risks associated with your workplace activities and in doing so follow a process to control those risks. If you cannot eliminate a risk, you must implement measures to reduce the level of risk, provide training to workers, and provide PPE – which can include hi-vis.
Protective clothing is one of many control measures used to mitigate risk, however, it is the ‘last line of defense’, and all other reasonably practicable control measures should be in place first before relying on protective clothing. It is up to the PCBU if hi-vis clothing is a control that will be implemented on-site. However, we do recommend that it should always be worn around moving vehicles, plant and machinery.
Types of Hi-Vis
There are many types of hi-vis clothing available in New Zealand, and it is important to understand the different types., what is appropriate for your workplace, and ensure that you supply hi-vis that meets the standards. The only two hi-vis colours that are acceptable in NZ are yellow and red-orange.Red is only allowed if it is in the orange spectrum. Otherwise, it cannot be considered a hi-vis colour, because it is not easily visible for some people with a specific type of colour-blindness.
- Class D – (Daytime use) made from fluorescent or other high visibility materials, are designed for daytime use. They are intended only for use in workplaces where lighting levels are good, and no work is done outside of daylight hours.
- Class N – (Nighttime use) designed and only suitable for night use, with no background material specified. The reflective tape must meet certain measurements and configurations.
- Class D/N – (Day and nighttime use) These garments combine fluorescent or other high-visibility background materials with strips of reflective tape, making them suitable for day and night use, or for work areas where there are low light levels.
Maintaining Hi-Vis
It is important that the correct hi-vis is selected and used correctly. Your workers should know:
- When using hi-vis is required
- How to wear it correctly, and that the zippers/velcro need to be done up securely
- Be of a suitable fit and not interfere with normal movement
- Be compatible with any other PPE requirements
- Know when to request a replacement due to damage/wear and tear
Hi-vis should be maintained to ensure that it remains effective, over time the materials can fade which will affect the performance of the tape and fabric. It should be regularly checked for wear and tear, fading, and ensure that there are no additional fabrics, logos, or pockets impacting the functionality of the hi-vis in accordance with the standards AS/NZS 4602 and AS/NZS 1906.4.
If you have any questions get in touch with the HazardCo team
HazardCo was created by tradies, for tradies. We understand that on-site risks change, all day, every day, and have experienced what happens when they aren’t well managed first hand. So we formed HazardCo to help tradies get their health and safety sorted – and help you to feel confident that you’re doing the right thing.
HazardCo’s digital health and safety solution uses everyday technology to help you complete all your health and safety requirements – all from your back pocket. Plus, HazardCo helps you to cut back on paperwork and saves you time by using straightforward templates and reports, which are full of tips and suggestions to give you the confidence you have it all covered.
You can use the HazardCo App on your smartphone to create a Toolbox Meeting, Site Review, Risk Assessment, Incident Report, Vehicle Checklist, and more. The app is packed with simple-to-use tools that guide you through each of these activities, making them super quick and easy to complete. The HazardCo App enables our members to feel confident that they are on top of their health and safety from anywhere, at any time – whether they’re on-site, taking a coffee break, or even at home after a long day at work.
HazardCo takes the hassle out of getting your team on board because the app is free to download for everyone on-site; this includes subbies, your team, and also visitors to your site. This means that at the site Hazard Board all they need to do is use the app or your camera to scan the QR code when they sign in and out which gives you the visibility of knowing who has been on-site and when, without having to be there in person. Plus, there’s no need for loads of paperwork and meetings the first time someone arrives on-site – all they need to do is scan in and complete their induction on their smartphone. It’s simple, smart, and time-saving while also giving you the confidence of knowing you have your bases covered.
Along with the app, being a HazardCo member also gives you access to the HazardCo Hub – our digital tool for setting up new projects. All of the information you need is stored online meaning that you can login from anywhere, at any time. Plus, you can use the hub to view, download, and review activity reports, including site reviews, risk assessments, and inductions.
Good health and safety practices are about more than just following the rules; they’re about doing the right thing to keep you and your team safe. HazardCo’s smart digital tools save you time and paperwork, giving you the confidence that you’re doing everything you can to keep your team safe.
Any questions, get in touch with the HazardCo team today
When it’s not possible to work from the ground, the use of scaffolding is highly recommended to complete those at height tasks. Generally, any building, demolition, or at height repair works will require scaffolding.
Scaffolding has several benefits;
- Safety: Scaffolding is there as a secure structure for those working at height, providing a flat and balanced working platform that allows multiple workers to work at the same time.
- Access: With scaffolding wrapping areas of a building, it allows people to access parts of a building that may have been unattainable beforehand, such as wall or section of the roof.
- Positioning: With scaffolding, workers are smack bang in front of the area they are working on. No need for getting into awkward and unsafe positions.
There are other height equipment available such as;
- Mobile Elevating Work Platforms
- Podium platform ladders
- Safety nets
- Soft landing systems
- Fall arrest systems
Doing a thorough risk assessment is key to determining what the right equipment for the job will be. Use this table as a guide for your choice of height equipment.
As always if you would like to discuss your health and safety requirements further please call our Advisory team on 0800 555 339, extension 4.]
Working at height for work such as building a house, renovations, painting, decorating, or roof work? Scaffolding could be the safest piece of height equipment to use for the job as it provides workers with a flat-level working platform and of course fall protection.
Different types of Scaffolding
There are different types of scaffolds and the type you will use will depend on the environment you are working in and what is best suited to your task. The common types of scaffolding are proprietary and prefabricated, tube and coupler, and suspended scaffold. If you want to know more about these systems, click here.
Anyone involved in the installation of scaffolding is required to have the knowledge and skills to do so. Scaffolding up to 5 metres should be installed by a competent person. Competent means someone who has the knowledge and skills to carry out a particular task like installing scaffolding. The easiest way to gain this knowledge and skills is through training, qualification, experience or a combination of all three.
It is important that you know that scaffolding greater than 5 metres must be installed by a person who holds the appropriate class of certificate of competence (COC) for the type of scaffolding. Scaffolding over 5m is also notifiable to WorkSafe. This can be done online here.
We have a Scaffolding Task Analysis (TA) that you can use. This TA outlines the hazards, risks and controls that need to be put in place when it comes to installing and using a scaffold. Also available is a pre-start checklist for you to conduct your daily checks before use. These can both be found in the templates section of the HazardCo HUB. We will touch on in week 3 about the when, what, how and why when it comes to checking scaffolds.
Musculoskeletal disorders (MSDs) are the most common workplace injury and cause of lost time at work, so spending time to focus on it makes good business sense.
Research has shown that the old approach of teaching a person how to lift correctly has not been effective in reducing these problems. Many workplaces pay to bring various experts into the workplace to help them address Musculoskeletal disorders but a lot can be done inhouse by those leading the business.
1. Survey your workers for discomfort pain and injury using a body map:
To start a discussion around MSDs print and hang a poster of a body on a whiteboard or wall (see body map at the end of this article). Next to the poster, provide a marker or stickers for the workers to use to place crosses on the body parts where they have experienced pain or other MSD symptoms in the past week or month. Each worker can also make a mark at the bottom of the poster to indicate that they have contributed. When there is the same number of marks at the bottom as the number of workers, or it’s been established that everyone who wants to contribute has done so, the patterns that emerge from the poster can be used for a toolbox discussion and brainstorming session.
2. Ask your workers to take photos of things they think contribute to discomfort, pain, and injury at work:
Ask workers to take photos using their mobile phones over a two-week period. Each person (workers and managers) should take two or three photos of something that they perceive as risky or that they find triggers MSD symptoms at work. They can also take pictures of work situations or equipment that they perceive as helping to prevent MSDs. The quality of the photos doesn’t matter and they don’t have to be self-explanatory. Ask each worker or manager to provide brief explanations of their photos. To give an example of a photo of a risk, it might show the height of a ladder on a vans roof rack (which requires force and an awkward body position for workers to reach). An example of a picture of something that helps to prevent MSDs might be a photo of colleagues helping each other during a pressured time. Each person can be helped to print out their photos and stick them to a board (e.g. in a lunchroom or meeting room). Once the photo shoot is over, arrange a toolbox talk at which all the photos are on display and the topics raised can be discussed. The aim is to establish a shared understanding of what the photos represent.
3. Think about the physical and mental demands on your workers
There are well known physical and mental demands of work that lead to MSDs and lower productivity. Identify if you have any of these issues in your business:
- Excessive physical or mental workload: not enough time to do the job, too much work, permanent time pressure, long working hours
- Tasks do not match workers’ skills: they are too difficult or too easy
- Tasks are monotonous and repetitive; workers have no opportunities to feel a sense of ownership of any tasks
- Workers are required to be constantly available, e.g.to respond to emails and phone calls outside working hours
- Many physical risks are present in the workplace, with no preventive measures
Aim to address these demands by:
- Make sure there is enough time to do the job, workload is regularly monitored and extra resources are provided during ‘peak’ times
- Provide tasks that allow workers to make use of and develop their skills and competencies
- Provide tasks that are challenging and interesting; workers feel a sense of ownership of their work
- Respect your workers’ need for a good work-life balance so there is enough time outside work to recover and recharge
- Provide a good physical work environment, with protective measures implemented to tackle risks
4. Where possible get work up off the ground:
Working and handling at ground level places strain on our bodies which overtime can develop into MSDs. Take photos of tasks that require stooping and bending to complete at your workplace. Look for items that are stored on the ground. During toolbox talks discuss ways which the task can be redesigned by raising the work off the ground for example with a trestle, pallets or providing a table. If it can’t be raised, can we extend our tools or modify our position to compensate?
5. Where possible eliminate overhead work:
Jobs that require overhead work are 2 to 3 times more likely to result in a shoulder injury. Overhead work becomes more hazardous when the arms are elevated over 60 degrees. Use a toolbox talk and photos to identify where overhead work is required. Where possible aim to eliminate it and where it must remain look to design alternative ways to complete it. This includes reducing the force required, using lighter and smaller tools, keeping the arm below 60 degrees and using frequent rest breaks.
If you have any questions get in touch with the HazardCo Team today
Looking for something in particular?
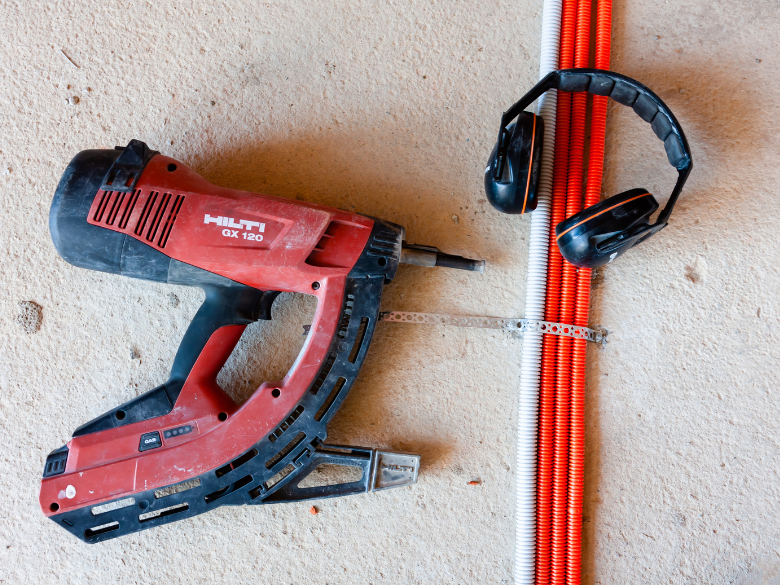
Nail guns are common tools on residential builds. Like any power tool, they can cause serious injuries if not used properly.
Most injuries happen when the gun goes off while being moved or ...
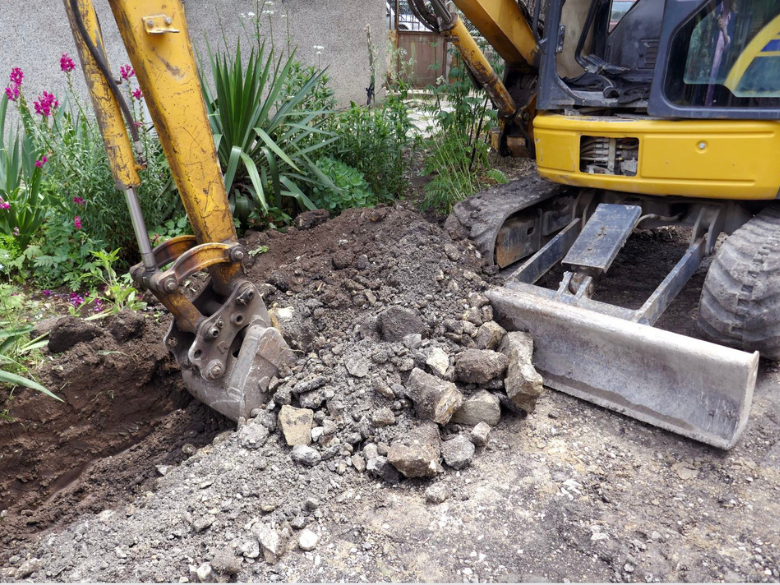
Excavation work means moving or removing soil, rock, or other materials with tools or machinery. You’ll come across it on most construction sites whether you’re building a new home, putting in...

Summer’s here. Are you ready for the heat?
Longer days and sunshine make it feel like the perfect time to crack into work. But while summer brings good vibes, it also brings its own set of ri...

Kick off the New Year safely on site
The holidays are done and dusted, and it’s time to ease back into work. Reopening your site is just as important as shutting it down properly and the New ...

The Christmas break is nearly here. You're probably counting down the days until you can relax and spend some proper time with the family and friends.
But before you lock up for the holiday...

Good health and safety isn’t about stopping work, it’s about having simple, clear processes so everyone understands how to get the job done safely.
When you plan the work and manage the ris...

The hidden danger on-site: Silica dust
Construction sites come with plenty of obvious hazards but some of the most dangerous ones are the ones you can’t see. One of those hidden risks is res...

Slips, trips, and falls, don’t let them take you down!
Slips and trips might seem harmless, but on-site, they’re one of the biggest causes of injuries. A bit of ground clutter, a wet floor,...
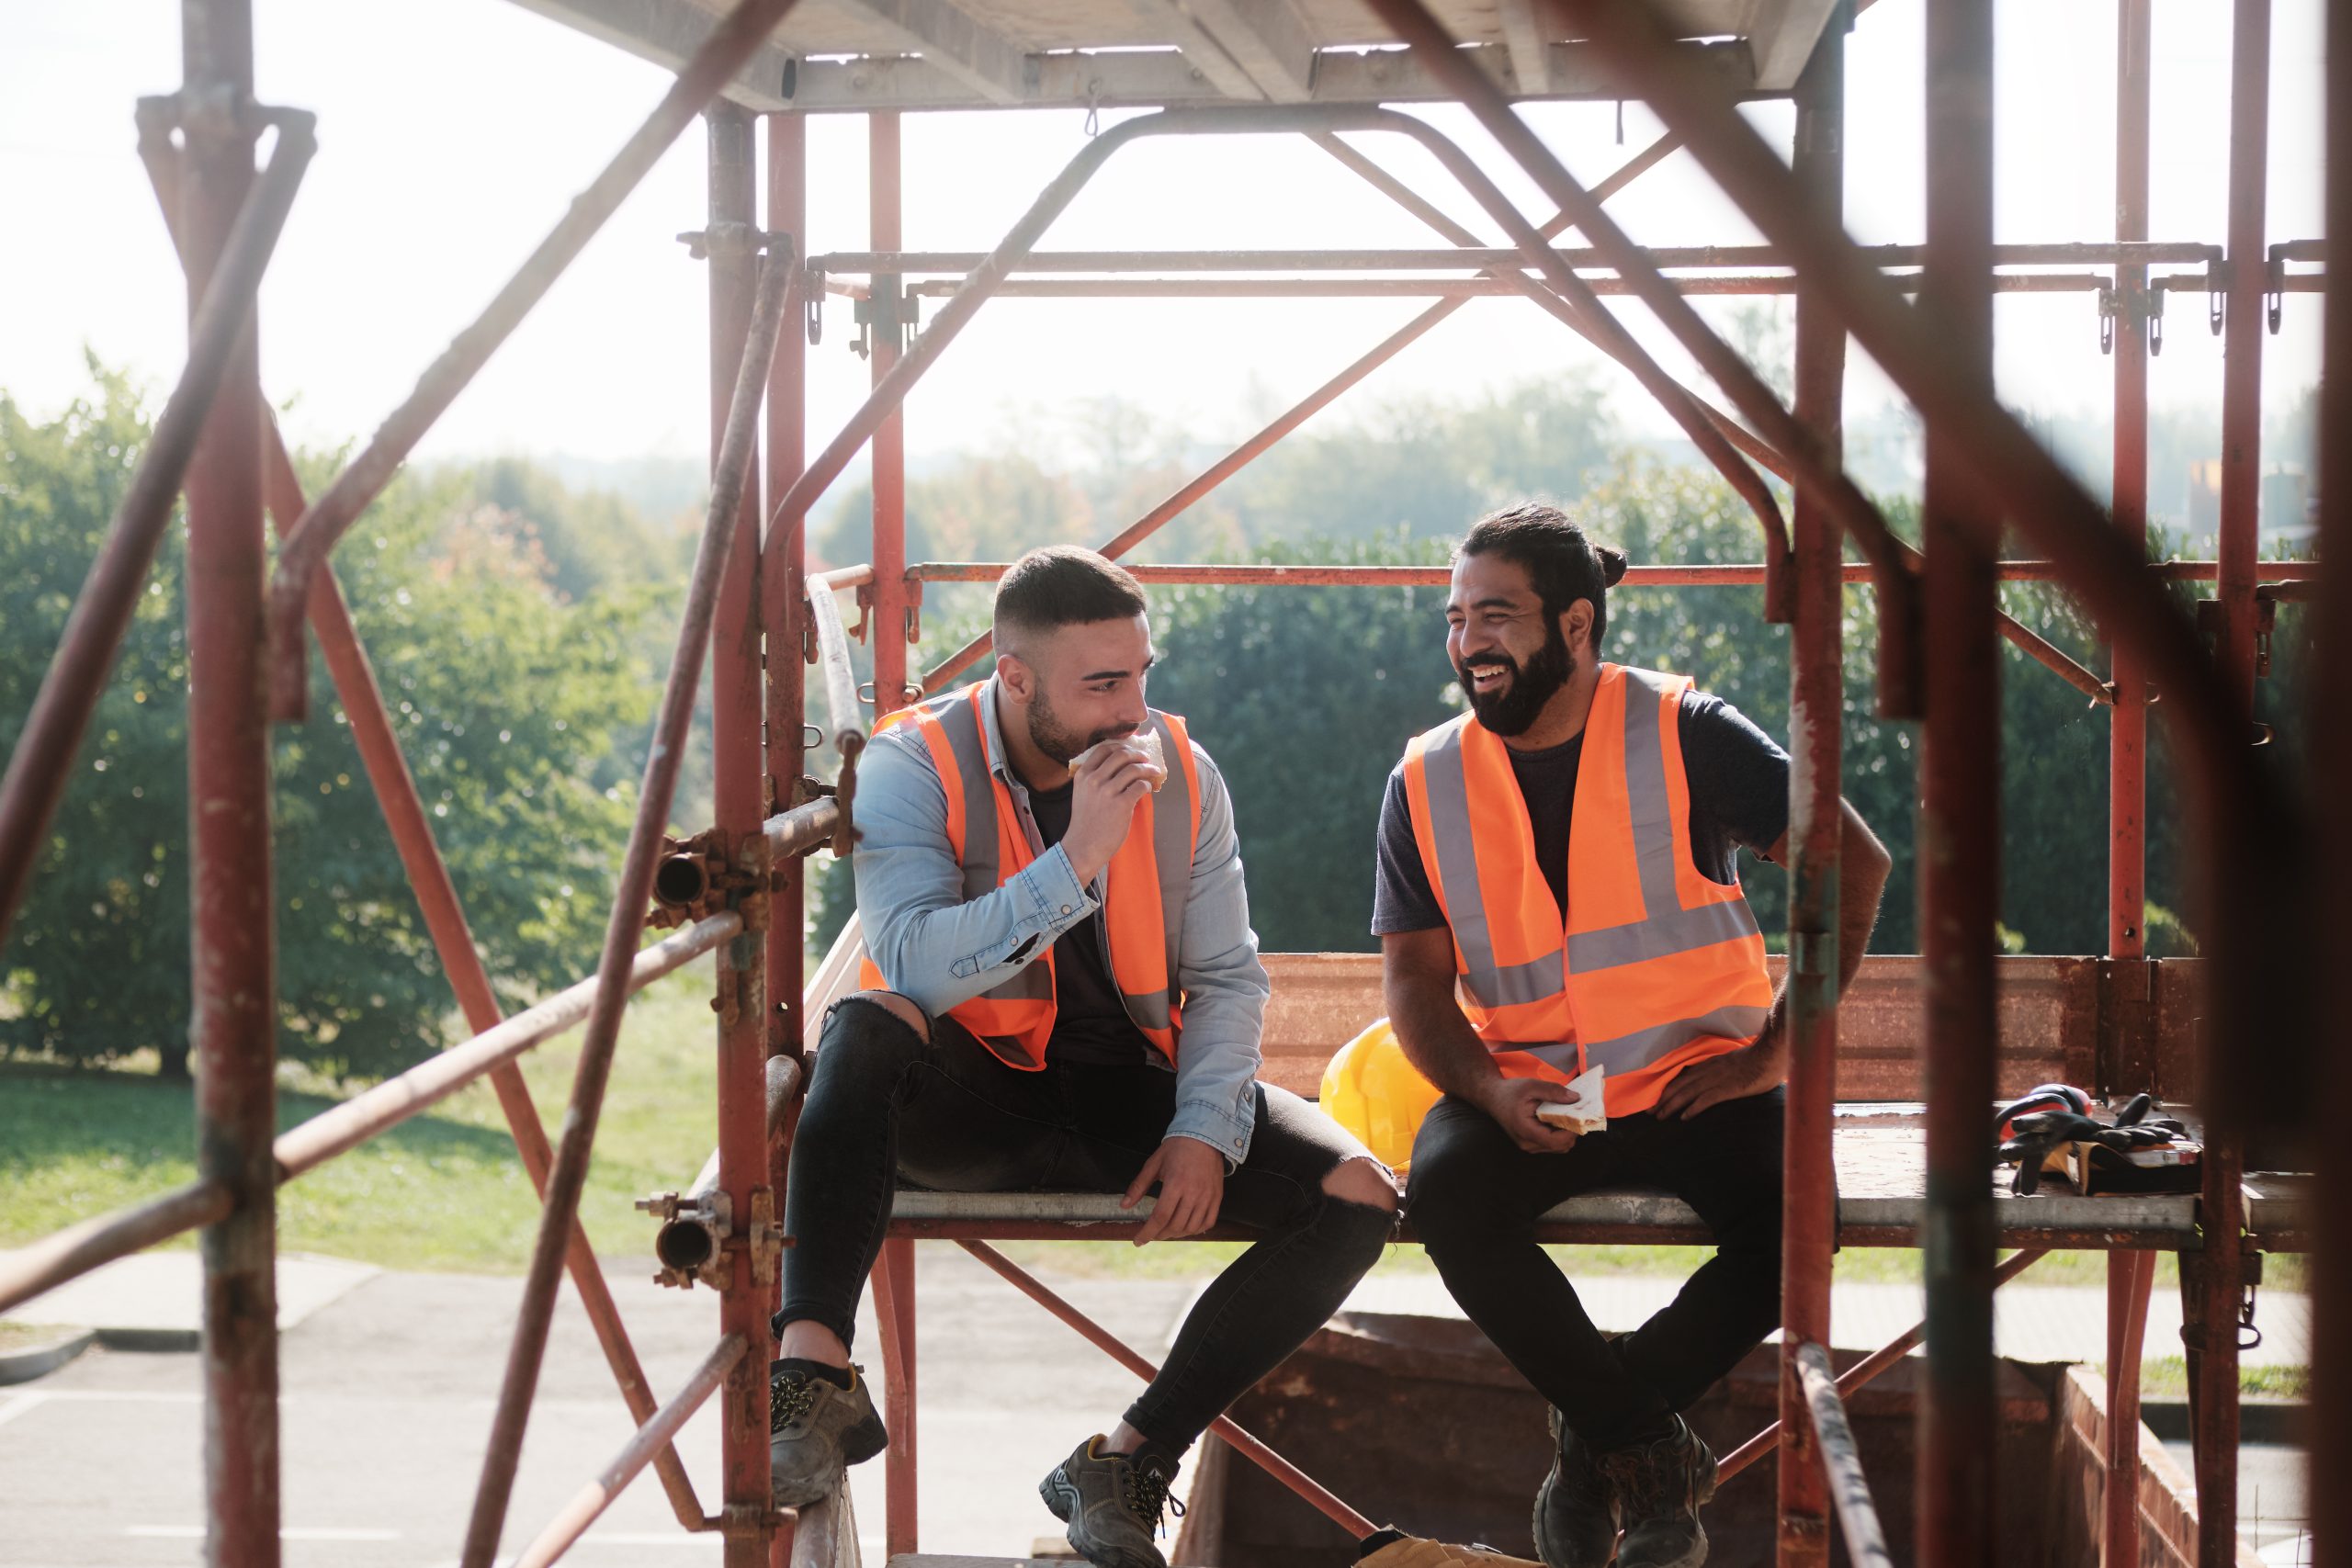
Your business is only as strong as your people. When workers get injured or struggle with stress, everyone feels it through missed deadlines, extra pressure, and lost skills on-site.
The go...

Got lone workers on your team? Here’s what you need to know
If someone on your team is working by themselves without other people around and without direct supervision, they’re likely conside...
Take the Hassle Out of Toolbox Meetings
Toolbox meetings don’t need to be a paperwork mission. With the HazardCo App, you can run quick, focused chats straight from your phone – No prep, no p...

Get your team scanning in and out – it’s a no-brainer!
We get it, health and safety chats aren’t always the most exciting. But they are the most important. When everyone on-site takes part,...


