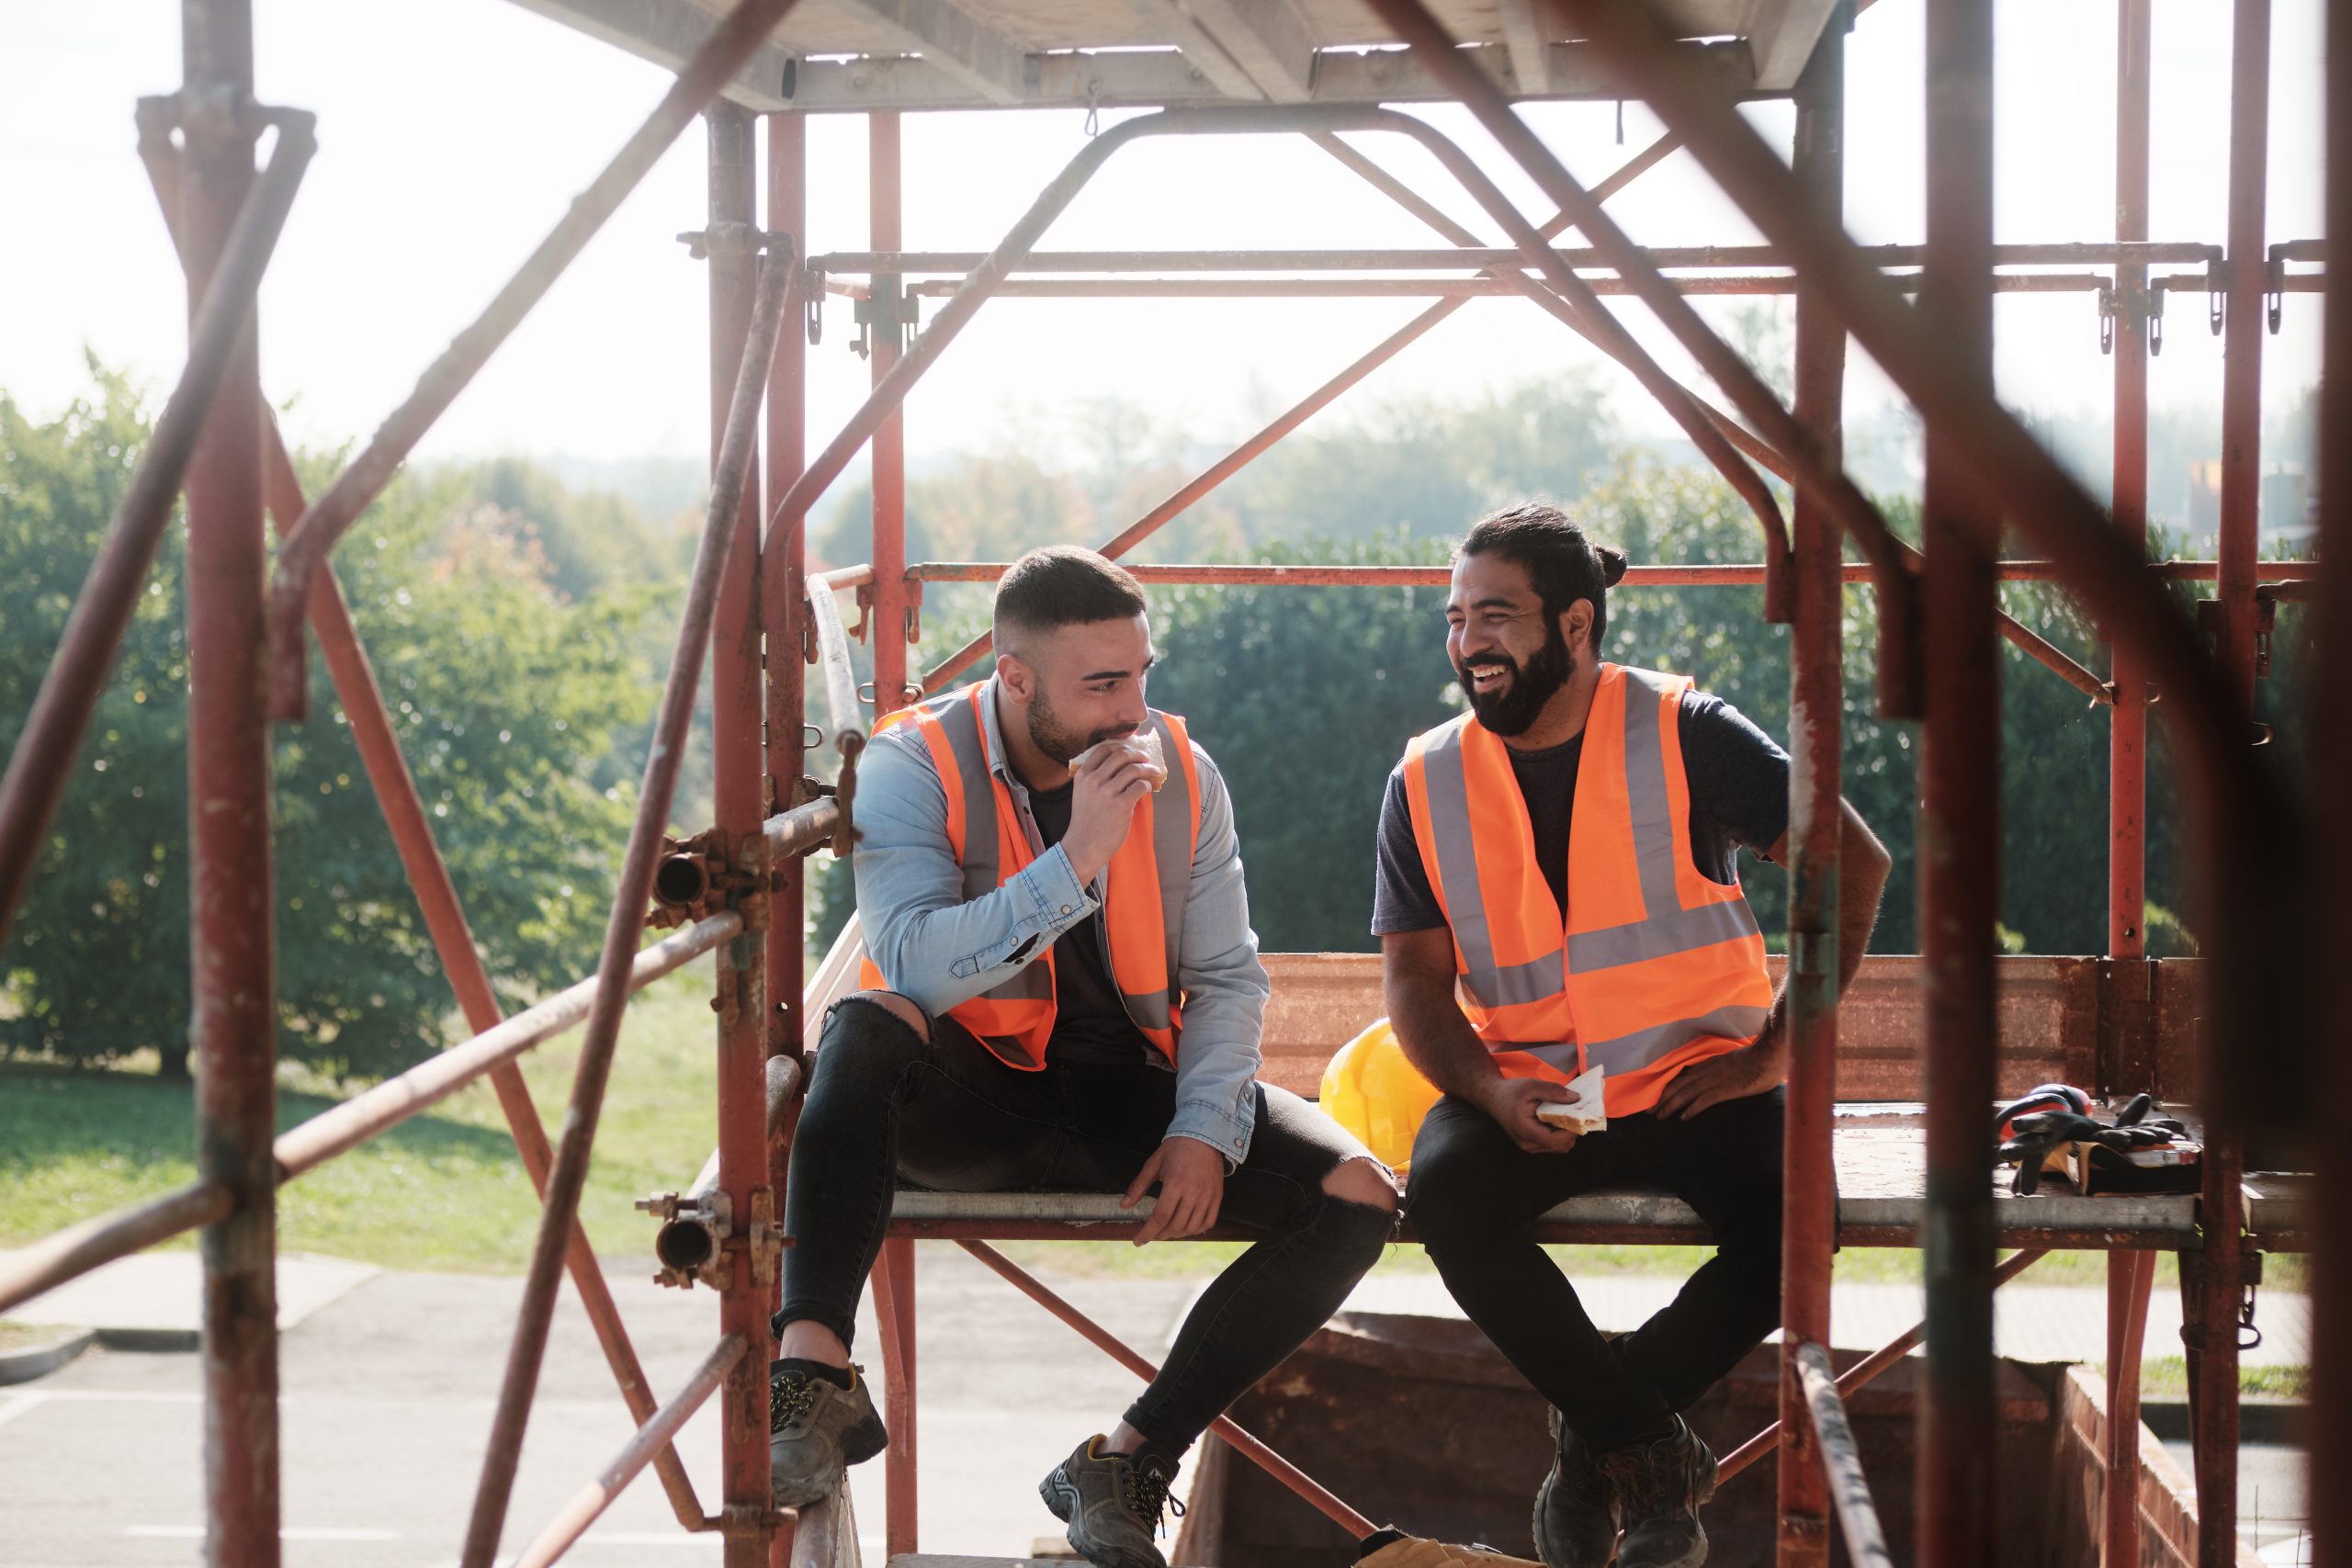
Take the Hassle Out of Toolbox Meetings.
Toolbox meetings don’t need to be a paperwork mission. With the HazardCo App, you can run quick, focused chats straight from your phone. No prep, no printing, no hassle.
The Toolbox Meeting feature guides you through what to cover, step by step, so you can hold the meeting anywhere on-site and tick off all the right boxes as you go. It’s all recorded in the app, and a full report lands in your Hub, ready to download or share with the team.
How often should we have a Toolbox meeting?
- Daily meetings: The gold standard in construction and high-risk sites. Kick off each shift with a short chat on that day’s hazards. These pre-starts keep safety front-of-mind and teams coordinated so everyone knows what’s going on.
- Weekly meetings: Hold more in-depth sessions at least once a week to discuss recent incidents, site safety issues, changes to plans or regulations, new equipment or procedures, and upcoming high-risk work.
- Ad hoc meetings: Jump in when new risks pop up: weather shifts, incidents, or handle issues that can’t wait.
Keeping toolbox meetings regular boosts safety in three big ways: they keep safety top of mind with frequent check-ins, help build a strong culture where everyone’s looking out for each other, and give you the chance to spot and fix hazards before they turn into incidents.
What to cover in a Toolbox meeting:
Stuck for ideas on what to talk about? Here’s some great starting points:
- Today’s tasks and risks
- Weather conditions
- PPE requirements
- Recent incidents or near misses
- Any changes on-site
- Questions from the team
Keep your toolbox meetings interactive by getting the crew involved, it makes a big difference. Ask for feedback at the end of each chat to see what’s working (and what’s not). Encourage the team to speak up about any issues they’ve spotted on-site. When everyone has a voice, safety becomes a team effort, not just another box to tick.
Cool tip to save you time: Use your phone’s voice-to-text tool to speak your notes out loud (just look for the little mic on your keyboard). You can even snap a quick photo to record who was there.
Working solo? You can still use the App toolbox feature to log safety convos with other tradies or subbies. Every chat counts.
And remember, the Toolbox Meeting feature isn’t just for toolboxes. Use it for pre-starts, safety meetings, or committee catch-ups too.
Keeping your site safe starts with good conversations – and with HazardCo in your hands, they’re easier than ever.
Get your team scanning in and out – it’s a no-brainer!
We get it, health and safety chats aren’t always the most exciting. But they are the most important. When everyone on-site takes part, it makes a big difference. And the easiest place to start? Get your team and subbies scanning in and out of site each day.
Your HazardCo QR code (on your Hazard Board) makes it quick and easy and the benefits stack up:
- You’ll always know who’s on-site – even if you’re not, the info is live in your app and saved to your Hub in real-time, so you can check back anytime.
- Productivity boost – tracking trades on-site helps with timesheets and planning.
- First-time users complete a site induction – so they’re across emergency contacts and safety rules from the get-go.
- Access to your Site Specific Safety Plan (SSSP) – key hazards, emergency plans, and control measures all in one place.
- Using Project Plus? This unlocks the app for workers to upload SWMS and use all the reporting features. They can also see site notices in the app, so it’s easy to keep everyone in the loop.
Scanning in each day is also a good nudge to stay switched on about safety. The more we talk about it, the more we act on it, spotting hazards and taking care of each other.
It also helps you:
- Share the safety responsibility across the team.
- Look after lone workers by tracking check-ins.
- Keep a clear record in case there’s an incident or investigation.
Need help getting the team onboard? Try this:
- Use your next Toolbox Meeting to show everyone how to scan in with the QR code.
- Offer your team a Friday shout if everyone scans in all week.
- Make it part of your contracts and set that expectation from the start.
There’s no downside, scanning in is fast, easy, and helps everyone go home safe. Got questions? Get in touch with the HazardCo team. We’re here to help.
Working with heavy machinery and managing traffic on-site can be risky. But with the right checks and planning, we can keep everyone safe.
Daily machinery checks
Before starting work each day, make sure your equipment is ready to go:
Visual checks (before starting the machine):
- Check fluid and oil levels; look for leaks.
- Ensure tyres are free from damage and in good condition.
- Confirm safety mechanisms are in place and working.
- Make sure warning signs are visible and readable.
- Inspect attachments, clips, and pins for damage.
- Look over hydraulics for any issues.
Stationary function test (with the machine on):
- Test the horn and reversing alarm.
- Check that lights, pedals, and controls work properly.
- Move the bucket and arms to ensure they operate smoothly.
Moving function test:
- Test the steering.
- Ensure brakes are functioning correctly.
Using your manufacturer’s checklist or the HazardCo Heavy Machinery Prestart checklist can help you cover all these points.
Managing site traffic
Keeping vehicles and people safe on-site requires a solid traffic management plan. Here’s what to consider:
- Traffic direction: Plan routes for vehicles, cyclists, and pedestrians.
- Delivery areas: Set up clear zones and schedules for loading and unloading.
- Site layout: Define speed limits, traffic flow, and place barriers or fences where needed.
- Safe practices: Establish procedures for loading, unloading, turning, and reversing.
- Site restrictions: Be aware of noise levels and traffic volume.
- Unattended sites: Plan how excavations are managed when no one is around.
- Emergency procedures: Have clear steps in place for emergencies.
Discuss this plan during site inductions so everyone knows the rules and expectations.
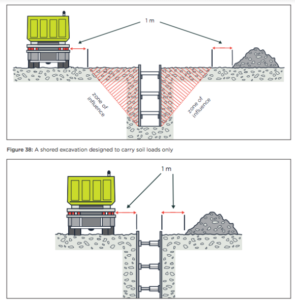
Know your limits: Zone of influence
Heavy machinery can affect the stability of excavations if operated too close. Keep all heavy vehicles, materials, and spoil at least one meter outside the zone of influence unless specific designs support closer operations.
Preventing tip-overs
Uneven ground can cause machinery to tip over, leading to serious injuries. To prevent this:
- Planning: Supervisors and operators should assess the area before work begins.
- SWMS: Make sure a SWMS has been prepared.
- Risk assessment: Operators should evaluate risks before starting each job.
- Safe routes: Choose the safest paths for moving machinery.
- Digging practices: Never dig underneath an excavator.
- Distance: Work at a safe distance from excavation edges.
- Procedures: Have standard operating procedures in place.
- Design: Ensure work areas are designed to control hazards.
- Safety features: Equip cabs with roll-over and fall-over protection; operators should wear seat belts and keep doors closed.
- Exits: Ensure there are always two exits from the excavation.
If you would like more information head over to our website or to chat with one of our friendly Advisory team please give us a call on 1800 954 702.
Demolition machinery
Working with heavy machinery can be dangerous. Incorrect use or untrained operators can lead to serious injuries or worse.
Training and supervision
Machinery should only be used by workers who are:
- Trained and competent with the equipment they’re operating
- Supervised, especially if they’re new or unfamiliar with the task
- Provided with clear instructions, risk assessments and SWMS
Regularly assess operator competency through refresher training, observations and feedback. Keep training records and verify workers have the appropriate licenses.
Pre-Start Check – A quick routine that makes a big difference
Before using any machinery, complete a daily prestart check. These checks must be done by a trained and competent person.
Visual checks (before turning the machine on):
- Fluid and oil levels are good, and there are no leaks
- Battery is clean, charged and secured
- All safety guards and features are in place and undamaged
- Warning signs are in place and easy to read
- All clips, pins, and attachments are secure and not worn or damaged
- Hydraulic hoses are in good condition and lubricated
Stationary test (machine is on but not moving):
- Horn, reversing alarm and lights are working
- Pedals, and control panel are working properly
- Bucket and arms fully extend, retract and tilt smoothly
Moving test (short drive):
- Steering is responsive
- Brakes function correctly
Use the manufacturer’s pre-start checklist, or the HazardCo App Plant/Machinery Pre-start tool to guide your checks. Making sure to keep a record of your completed checks.
Quick Hitches, Safety Locks, and Exclusion Zones – Take the time to get it right
Quick hitches help you swap attachments fast – but can be dangerous if not properly secured.
Before operation:
- Confirm the attachment is the right fit and in good condition.
- Visually check all locking pins and safety devices are installed correctly.
- Set and mark exclusion zones and communicate these to all workers on-site
All quick hitches must clearly show:
- Model and serial number
- Manufacturer’s name
- Weight and max rated capacity
- Safe lifting capacity for each lifting point
Store spare locking pins with the machine, and only use attachments that match the correct pin size.
Cover any machinery risks and controls in your SWMS and share it with everyone on-site.
Don’t cut corners on safety
Missing a step like skipping a daily check or rushing an attachment change can have serious consequences.
Taking five minutes to do it right can prevent serious injuries and keep your sire running safely.
If you have any questions, get in touch with the HazardCo Team today
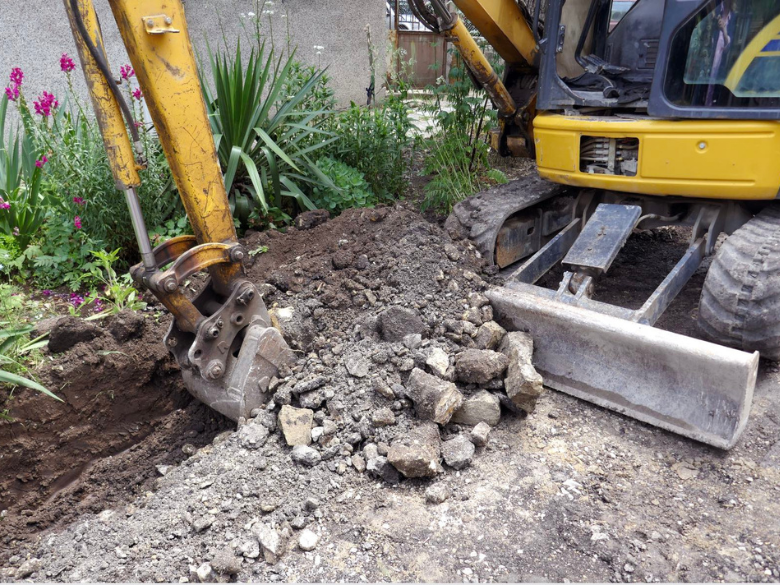
Digging into the ground might seem straightforward, but excavation work is actually one of the most dangerous parts of construction. That’s why it’s important to plan ahead and put the right safety measures in place to keep everyone safe on site.
Start with a solid plan
Before you get started, take some time to plan things out. Planning involves identifying the hazards, assessing the risks, and deciding suitable controls — all with input from the team. Every site is different, so take its unique features into account.
Watch out for these common excavation risks:
- Securing the area
Keep excavations fenced off with sturdy barriers that won’t give way if someone leans or falls against them. If you’re not actively working in or near the trench, cover it up or backfill it as soon as possible.
- Falls from height
If there’s a chance someone could fall from one level to another, it’s considered working at height. Make sure you have effective controls in place to prevent falls.
- Ground collapse
This is one of the biggest dangers. Don’t assume the ground will stay put. Use shoring, benching, or battering to prevent it from caving in.
- Safe ways in and out
Make sure workers have safe access at all times. Keep the bottom of the excavation clear so nothing blocks a quick exit in an emergency.
- Underground and overhead services
Always contact Before You Dig Australia. Know what’s under and above you — hidden services can be a major hazard if you hit them.
- Water in the trench
Never let workers operate in a trench that has water pooling in it unless you’ve got the right safety controls in place.
- Do you need to notify construction excavation work?
Some excavation work needs to be reported to WorkSafe Victoria before you begin. If that’s the case, you will need to notify at least three days before work starts.
Keeping yourself and your team safe is what matters most. Make sure you’re clear on your responsibilities when it comes to managing excavation risks.
Need a hand? The HazardCo App has helpful resources for site reviews and risk controls. And if you’ve got questions or need support, just reach out to the HazardCo team – we’re here to help.
When you’re able to get back on site after a flood or storm, here are the hazards, risks and control measures you should consider to help reduce the risk of injury and illness to yourself, your workers and others involved in the clean up and repair effort.
Some common hazards following a storm or flood:
- Electrical – Water damage, loss of power, damaged electrical installations
- Biological hazards and fauna – Contaminated floodwater and displaced fauna
- Asbestos – Damaged building materials that contain asbestos
- Slips, trips and falls – Uneven surfaces from storm/ floods
- Hazardous chemicals – Buried, moved or damaged hazardous chemical containers including corrosives, oils, pesticides
- Psychological stress – Remember to check on your team, the emotional impacts of a storm or flood can be overwhelming, particularly if they are dealing with personal damage
Risk Management
- Identify the hazards – What are the hazards on your site including any newly introduced hazards due to the storm or flood?
- Assess the level of risk – What is the likelihood of exposure to the hazard, and the consequences (what harm could be done)?
- Control the risk – Identify and implement suitable control measures and ensure the risk has been reduced to an acceptable level prior to undertaking related work.
- Review the control measures – Regularly assess how effective the controls are. It’s important to stop work and reassess if conditions change or if you have introduced any new hazards.
Safety tips when undertaking the cleanup and repair work
- Work out the order of the work to be done so that new risks are not introduced, e.g. if you move things in the wrong order is there a possibility of creating instability.
- Ensure surfaces are stable and access to areas with unstable floors are safe.
- Have a licensed electrical contractor check any electrical appliances or equipment you suspect has been submerged or damaged.
- Check in and under objects before attempting to move them as snakes, spiders and other undomesticated animals may be taking refuge from flood waters.
- Consider workers performing cleanup in teams/ pairs where possible.
- Wash your hands well before eating and drinking, after contact with mud, flood water and contaminated items and equipment.
- Make sure that workers have the correct personal protective equipment to prevent injuries such as cuts and scratches or infections from contaminated flood water.
- Check that your workers and contractors are not fatigued or potentially unfit to work, i.e due to mental health stressors.
- Agree on what situations workers should remove themselves from, where the risk cannot be reduced to an acceptable level. Some work may have to be delayed until water subsides and other factors.
- Ensure emergency procedures are discussed for the site with all workers.
Dust is a common hazard in the construction industry, especially during demolition or refurbishment. When buildings are demolished they can release materials that create hazardous dust (airborne contaminants) which can be hazardous to workers’ health. Understanding the risks will help you to identify how best to manage the risks.
Why is dust dangerous?
Exposure to hazardous dust can lead to serious health conditions, including:
- Silicosis – A lung disease caused by inhaling fine silica dust, common in concrete, brick, and stone materials.
- Lung Cancer – Prolonged exposure to certain airborne contaminants increases the risk.
- Asthma & COPD (Chronic Obstructive Pulmonary Disease) – Inhaling dust particles can trigger or worsen respiratory conditions.
- Skin & Eye Irritations – Dust exposure can cause infections and long-term discomfort.
Health and exposure monitoring
As a business, you have a duty to monitor your workers’ health when they’re exposed to certain substances and other hazardous materials. Regular health monitoring helps identify early signs of illness and ensures that the dust control measures in place are working effectively.
Health monitoring process should include:
- collection of workers’ demographic, medical and occupational histories
- records of workers’ exposure
- respiratory questionnaire and function tests
- in some cases, chest x-ray or other radiological procedure
It is important that you get your worker’s consent to monitor their health and engage them in this process.
Health monitoring should be carried out by a trained and competent person. They will also give recommendations based on the health monitoring results.
How to control dust exposure on-site
Controls to minimise the exposure to dust in the workplace could include:
- on-tool dust extraction systems – attach vacuum extraction directly to power tools
- water suppression – dampen materials to prevent dust from becoming airborne
- personal protective equipment (PPE) – ensure workers wear correctly fitted masks and protective gear
Making sure your workers have the right tools and information to complete the job safely includes training and understanding the risks involved, what to do if anything should go wrong, as well as the correct use, storage, and maintenance of PPE.
Other controls to consider are:
- limiting worker exposure – keep unnecessary personnel away from dusty areas
- task rotation – reduce the time any one worker spends in high-dust zones
- Dust containment – using sheeting or temporary screens to enclose the work to stop dust from escaping
Complete a SWMS for your demolition work through the HazardCo APP. This helps assess the risks and plan safe work processes. Involve your team so everyone can contribute and understand the plan.
Our team of health and safety experts are just a call away if you have any questions or would like to discuss further.
To put it simply, health and safety regulators (WorkSafe / SafeWork) work with you and your workers to keep you safe and healthy. Their main goal is to ensure that across Australia, businesses are safe and healthy environments. It’s important to know that not all visits are pre-arranged and inspectors are allowed to show up at any reasonable time, regardless of whether or not you’re there. So, what should you expect when they come a-knocking?
What does a site visit look like?
Typically a visit from WorkSafe/SafeWork follows the below process:
Step 1: Conversation
A friendly chat isn’t that scary, right? When the WorkSafe/SafeWork inspector first arrives, they’ll have a conversation. This discussion is a two-way street where they’ll be looking to learn about your business, what risks you’ve identified, the actions you’re completing to minimise them and answer any questions you may have. Ensure you use this opportunity to ask questions and seek clarification if anything doesn’t make sense.
Step 2: Observation
Following the chat, the inspector will usually take a walk around your worksite to have a look around. Sometimes its a general walk around, other times it may be focusing on a particular area or activity.
If the inspector sees anything concerning during the walkabout, they will discuss this with you further.
Step 3: Processes and Documentation
At this stage, the inspector might ask to see what kind of processes and safe practices you have. This could include anything from your risk assessments, worker’s licenses or training certificates, machine maintenance logs, to incident reports. The focus will be on whether your processes and records demonstrate good health and safety practices for your worksite, workers and business.
So what are inspectors allowed to do during the visit?
Inspectors have the right to:
- ask you, your employees or other people questions
- take photographs, recordings and measurements
- ask to see your documents, make copies or take the documents
- take items away with them for examination, testing or for use as evidence
What happens if an issue is found?
If the inspector does find an issue, you and the inspector will discuss what needs to be done to fix it. The three main outcomes issued by the inspector are an improvement notice, prohibition notice, or an infringement notice.
- Improvement notices – The most common type of notice which directs a person to address an identified health and safety risk in a specified time. The inspector will explain what was identified, how things need to change, and the timeframe in which it needs to be completed.
- Prohibition notices – Directs the business to stop doing a particular thing that involves a serious risk to health or safety. For example, stopping a specific activity or instructing you to stop using a dangerous piece of machinery. The notice will tell you what needs to be fixed.
- An infringement notice – This notice, or fine, is a penalty for breaking the law. Depending on your state or territory it can include an on-the-spot fine for breaching certain health and safety laws and may lead to prosecution.
Using HazardCo can cut the time you spend on health and safety admin in half and can guide you through what you need to do to keep your workers and your business safe.
Of course, if there are any questions or concerns, just call us at HazardCo for help on 1800 954 702.
When you have an incident on-site, whether it’s a near miss, an injury, or a work-related illness, it’s important to document an incident report.
Incident reports don’t need to be time-consuming, lengthy or use fancy health and safety terms, you just need to describe what happened in your own words so you have a record of the incident. You can use the incident report to help explain what happened to others, such as your direct team on-site, contractors, other Employers, or the Principal Contractor.
What is an incident report?
An incident report is the process of recording incidents on-site, such as near misses, injuries, illnesses and plant/property damage. It involves documenting all the facts (known so far) related to the incident.
Check out this blog on managing and reporting incidents at work to learn more about what is considered an incident and why it’s both important and helpful to report incidents.
How to complete an incident report
Example incident report: Hit body on object
Hitting your body on an object is a very common example of an incident. For this incident report example, we will assume someone on-site has hit their body on a door frame and injured their shoulder.
- Site Location
- 32 Dropsaw Lane, Cottesloe 6011
- People involved
- Joe Hazard (injured)
- Sam Small (witness)
- Larry Large (witness)
- Type of Incident
- Damage (equipment or property was damaged)
- Security/Theft (site accessed unexpectedly or something was stolen)
- Environment (Pollution or hazardous substance spill)
- Near Miss (Something occurred but there was no harm caused)
- Injury (Someone was physically hurt) ✅
- Illness (Work-related illness)
- Other (Something else happened)
- Other (Something else happened)
- Cause of Incident
- This is where you select from the the list of causes what the main reason for it occurring was – in this case, it’s person vs object.
- Treatment received
- First aid (performed on worksite)
- Medical Centre (Minor injury or illness) ✅
- Hospital (Major injury or illness)
- Unsure (I’m not sure what treatment was given)
- None (No treatment was required)
- Type of injury
- Select the category that best suits or select “other” to select your own, if you don’t know what type of injury happened you can also select “unknown”.
- Describe what happened – List the facts that are known so far about the incident such as :
- What job or activity was being performed at the time.
- What plant, equipment or tools were being used
- What went wrong
- What was the injury or damage (or the potential)
- What happened immediately after the incident
-
- Joe Hazard was carrying plywood through a doorway on-site when he hit his shoulder on the door frame. Joe felt immediate pain in his left shoulder and struggled to lift his arm above shoulder height. Joe informed Sam Small (Supervisor) immediately and agreed to go to the local medical centre for further assessment.
Pictures speak a thousand words so don’t forget that you can upload scene photos or relevant information in picture form at this step in the app, and if there’s something that you don’t want forgotten you can also create a task.
This is an example of a simple incident report, find out more about what good incident reporting looks like.
If you’re a HazardCo member, hit the Report an Incident button in the HazardCo App and follow the guided prompts to record the incident. Your membership includes 24/7 incident support, so if you need some extra help filling in the report, would like advice on if the incident is notifiable to the Regulator, or would just like to chat with an expert about how to communicate the incident to your team, we are here to help!
Remember, when you have an incident on-site, writing an incident report is just one action you need to take. Learn more about what to do when you have an incident on site.
Anything with wheels and an engine should be at the forefront of your mind on site.
From delivery trucks to excavators, if it moves, and it’s got some weight… then that means power! it’s going to cause some damage if it isn’t controlled. So always keep safety in mind!
Keep pedestrians and vehicles apart
Separate the two wherever you can with careful planning at the design and set up stages.
Minimise vehicle movements
Provide car and van parking away from the work area if possible. Also control entry points, and plan storage areas, so that vehicles don’t need to cross the site where people are.
Turning and reversing vehicles
A spotter wearing high-vis clothing should guide the driver who can’t see clearly behind their vehicle. Mirrors, reversing, warning alarms, sensors and cameras can also make all the difference.
People on-site
When untrained workers drive vehicles without authority, you’re in trouble. Always manage the training and access of drivers to your vehicles, including those visiting.
Visibility
The more the better, just make sure it stands out in the right way. From on-site lighting to aids for drivers (mirrors, CCTV cameras and reversing alarms) to hi-vis clothing for those on the ground. Find out more about the use of hi-vis clothing on-site in our blog here.
Accidents are preventable when risk is managed. How do you manage risk? You get a plan – a good one.
Traffic management plans
A traffic management plan documents and helps explain how risks will be managed. This might include details of:
- Designated travel paths for vehicles including entry and exit points
- Pedestrian and traffic routes
- Designated delivery and loading/unloading areas
- Travel paths on routes remote from the workplace, including places to turn around, dump material, access ramps and side roads
- The responsibilities of people expected to interact with traffic onsite
Every site is different, but your plan should be monitored and reviewed regularly. It should also be adapted when there are changes to your work situation.
If you have any questions get in touch with the HazardCo team today
Looking for something in particular?
Running a building business is hard at the best of times. Right now, with fuel prices putting pressure on the industry, a lot of business owners are carrying a weight that goes well beyond the...
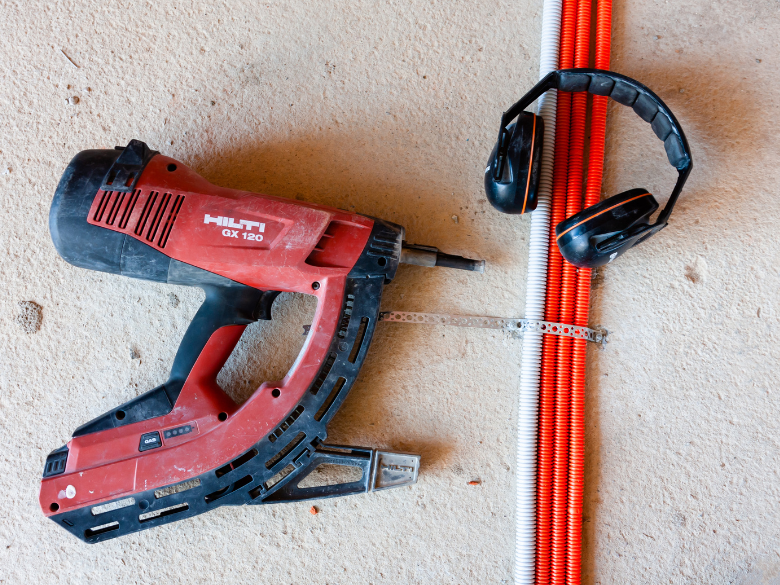
Nail guns are common on residential builds. Like any power tool, they can cause serious injuries if not used properly.
Most injuries happen when the gun discharges while being moved or repo...
Excavation work means digging or moving soil, rock, or other materials with tools or machinery. It is often done when constructing buildings, building retaining walls, or installing undergroun...

Summer’s here. Are you ready for the heat?
Longer days and sunshine make it feel like the perfect time to crack into work. But while summer brings good vibes, it also brings its own set of ri...

Kick off the New Year safely on site
The holidays are done and dusted, and it’s time to ease back into work. Reopening your site safely is just as important as shutting it down properly and t...

The Christmas break is nearly here. You're probably counting down the days until you can relax and spend some proper time with the family and friends.
But before you lock up for the holiday...

We’ve heard all sorts of myths and misconceptions when it comes to health and safety. We’re here to debunk some of the more common ones we hear.
H&S admin takes too long on-site...

MSDs (Musculoskeletal Disorders) are the most common type of work-related injury in Australia. In fact, over half of all serious workers’ compensation claims in construction back in 2024 were ...
Health in the construction industry is often overlooked, but it has a huge impact on workers and businesses. Physical and mental health issues are among the biggest reasons for time off work a...

Got lone workers on your team? Here’s what you need to know
If someone on your team is working by themselves without other people around and without direct supervision, they’re likely conside...
Take the Hassle Out of Toolbox Meetings.
Toolbox meetings don’t need to be a paperwork mission. With the HazardCo App, you can run quick, focused chats straight from your phone. No prep, no p...

Get your team scanning in and out – it’s a no-brainer!
We get it, health and safety chats aren’t always the most exciting. But they are the most important. When everyone on-site takes part,...


