These days everything is digital. Your payroll is managed online, you keep your team organised via email, and you can even order lunch straight to your site with just a few taps. So why are you still getting bogged down by Health and Safety paperwork?
HazardCo helps reduce the H&S burden with smart online tools to help you cut back on paperwork. Plus, it’s a time saver with its straightforward templates and reports which are full of tips and suggestions to give you the confidence that you have all your bases covered.
You can create a Risk Assessment, Toolbox Meeting, Site Review, Incident Report, or Vehicle Checklist using the HazardCo App on your smartphone or tablet. The app has tools to guide you through each of these tasks, making them a breeze to complete anywhere, and at any time. No longer will H&S be a taxing task because HazardCo members can stay on top of their H&S whenever it works for them, whether that be on-site, while grabbing a morning coffee, or pretty much anywhere that works for them.
We’ve found that people who have embraced going digital as part of their H&S strategy have seen it remove roadblocks, distractions, and excuses – because when you have H&S in the palm of your hand, you can’t not do it. Plus it leads to a safer worksite when H&S is the focus of people’s thoughts and actions.
At HazardCo, we understand the importance of H&S for keeping your team engaged, on track, communicating, and most importantly, safe.
If you haven’t gone digital with your H&S there’s no better time than now. Builders and tradies can start their free seven day trial today and see the difference that HazardCo can make for your H&S plan.
You know that old saying… “no pain, no gain’”. Well this is not true! Just because you work in the construction industry doesn’t mean that you need to be affected by short or long term pain.
Aches and pains are some obvious symptoms of musculoskeletal disease (MSD), but have you thought about what impacts MSD are having on you outside of work in your personal life?
What if constantly performing the same repetitive movement all day is causing you acute pain that means you aren’t able to kick the football around with your kids after work, or play golf on the weekend with your mates? Do you really want your work to impact your personal life, or your workers lives when there are some simple steps that could prevent it from happening?
As a business owner have you thought about the hidden costs?
Data shows that strains and sprains often become more problematic later in a construction worker’s career, with the largest claims in the housing construction sector. Between 2015 and 2019, 57% of ACC claims were MSD injuries, with the average cost being $3700, and a total of 1.9 million compensation days paid out, costing a total of $325m!
There is a large range of costs that surface when someone has an injury on the job, especially when they can’t return to work the next day or sometimes weeks or months. This has a huge impact on deadlines, bottom line, skills on-site and team dynamics.
Risky work that can cause MSD’s can be as simple as overhead or floor level work, manual and hand intensive work.
Have you thought about other ways you could be working to alleviate the stress on your body? It could be as simple as:
- doing a few warm-ups at the start of the day,
- breaking up your tasks throughout the day,
- taking a moment to stop and stretch throughout the task or
- choosing a different piece of equipment.
It’s common practice when you work out, that you warm-up and cool down, so why is working any different?
Accepting the reality of MSDs helps us formulate an effective approach to combat MSDs in our
Industry. There are a lot of myths out there about MSD, such as its caused by poor manual handling techniques. The trouble with myths is they create unnecessary fear and hinder progress so they need to be challenged. Over time, new evidence emerges to help us understand the reality of the situation and
our understanding of MSDs has changed significantly over the years. For example Len Rings saying “Don’t use your back as a crane” is no longer repeated as we now know you need to move your spine through its whole range of motion regularly to keep it healthy and strong.
Check out CHASNZ top five MSD myths in construction.
Let’s do our bit and raise awareness on-site around MSD. Next week we will give you some exercises that you can do to avoid being affected by MSD and if you are hurt how physiotherapy can help you.
If you have any questions reach out the the HazardCo team
Do you know what you need to do before you demolish or refurbish a property, building or structure? Find out what the asbestos regulations mean for you before doing any work.
Identifying Asbestos
Planning is key to identifying all potential hazards and the risks involved when doing any sort of demolition or refurbishment work. Asbestos can be found in buildings constructed or renovated before the year 2000 and as such it is more than likely to be present at your next job. You can find out more about where asbestos can be found in this WorkSafe resource.
Asbestos or asbestos containing material (ACM) must be identified and removed by a competent person before the demolition or refurbishment is started (unless demolition is required to gain access to the asbestos). Things to consider when planning your work:
- Are there inaccessible areas that are likely to be disturbed during the demolition or refurbishment?
- What is the type and condition of the asbestos or ACM?
- What is the quantity of asbestos or ACM?
- What is the method of demolition or refurbishment, and how will it affect the asbestos or ACM?
- If asbestos is likely to be disturbed during demolition or refurbishment, can it be removed safely before work starts; if so, how can this be done
If the competent person is unsure whether asbestos is present it must be assumed that it is and all steps taken to mitigate the asbestos risks. If asbestos is identified you must notify all parties involved such as the homeowner, landlord, occupant and/or the contractor in control of the site.
Asbestos Management Plan
Any works where asbestos has been identified will require an asbestos management plan. This outlines where any asbestos or ACM has been identified. Your plan must contain the following:
- the identification of asbestos and ACM (eg where any signs and labels are located)
- decisions, and reasons for the decisions, about how the asbestos risks are managed (eg safe work procedures and control measures)
- procedures for recording incidents or emergencies involving asbestos in the workplace
- information about the workers carrying out work involving asbestos, including
- information and training that has been or will be provided
- their roles and responsibilities
- any health monitoring that has been or will be conducted.
Other information may be included in the asbestos management plan, such as:
- a timetable for managing asbestos exposure risks (eg priorities and dates for removal, reviews, circumstances and activities that could affect the timing of action)
- procedures, including a timetable for reviewing and (if necessary) revising the asbestos management plan and asbestos documentation
- waste disposal
- air monitoring procedures, if required.
Emergency Planning
An emergency plan is required for demolition work where plant and structures contain asbestos. When developing the emergency procedure, you should consider:
- the work being done in the workplace or home
- hazards in the workplace or home
- the workplace or home’s size and location (eg remote location, multi-level site with shared services)
- the number of workers and other people who might be at the work site (eg workers on shifts, maintenance and cleaning personnel, customers, people working alone).
The procedure should include:
- how to respond effectively to an emergency
- evacuation procedures
- notifying emergency services
- getting help, including medical treatment
- effective communication between the person the PCBU authorises to co-ordinate the emergency response and the people at the work site
- provisions for regularly testing the procedure
- what information, training and instruction will be given to relevant workers about how to put the emergency procedure into effect.
The emergency procedure must be carried out if there is an emergency.
If the plant or structure is not structurally sound or is going to collapse, WorkSafe NZ should be notified as soon as possible.
Disposal of Asbestos
Before demolition starts, think of how you are going to dispose of the waste. Having a good waste containment and disposal process is just as important as having safe processes for working with asbestos.
Asbestos is considered special waste and special waste needs to be handled, buried, pre-treated or tested before it can be disposed of at the landfill. You need to make an application if you want to dispose of special waste.
Applications are often called special waste disposal declarations. Contact your local landfill to enquire about what they require before taking any material to them.
Not all landfills or transfer stations are authorised disposal sites, check with your local council to find out where your local authorised site is.
Double-bag all waste, all waste including single use masks and coveralls, cloths and plastic sheets should be double-bagged in heavy duty plastic bags. Twist the top of bags tightly, fold the necks over and seal with adhesive tape. Clearly mark the outer bag as asbestos waste.
Check with your receiving landfill for further details especially around handling details. There are often restrictions around how the material is offloaded.
If using skip bins or wheelie bins on site, be aware that many providers of these bins do not allow asbestos to be disposed of in them. Check your provider first for approval.
Document your disposal process in your Asbestos management plan and Asbestos Task Analysis (TA) considering the above.
As a HazardCo member you have access to a library of TA forms located in your Hub, which include demolition and the removal of non-friable asbestos for anything less than 10m2. Use of these resources will help you to identify the hazards and risks in your workplace and the recommended controls.
Our team of Health and Safety Advisors are here to help you with anything you are unsure of, give us a call on 0800 555 339, option 4.
Demolition is not just the knocking down of buildings or structures, it also includes smaller maintenance and renovation work such as the dismantling of parts of structures (e.g. one part of a steel-framed building) or the removal of walls.
When planning your works you need to first identify the hazards and manage the risks:
- Protection of the public and workers – Fencing and barriers are in place to prevent unauthorised access or controlled access and egress by a licensed person
- Overhead and underground utilities – Ensuring all services have been identified and are isolated or disconnected
- Asbestos – Asbestos has been identified, managed and removed prior to demo. We will discuss this more in our next blog
- Dust – Use of water to dampen down the area
- Fire and explosives – All hazardous materials or substances have been removed from the area of work before commencing demolition
- Weather – Plan for bad weather and control harmful or hazardous run off
- Working at heights – Where possible work from the ground, ensure you have the right fall protection and working platforms to eliminate or minimise the risk of falling from one level to another
- Identify the correct personal protective equipment (PPE) & respiratory protective equipment (RPE) needed for handling and disposing of hazardous building materials
When demolition is involved there is always the potential for the collapse of the structures. Ensure structural / supporting elements are identified before demolition (you may need to seek structural engineers’ help identifying these, and in what order to take them down).
- Identify what work is carried out internally by people and what is / can be carried out externally by machinery to ensure safety.
- Plan to manage falling objects and unplanned structure collapse
- Know the proximity of building or structure being demolished to other buildings or structures
- Walls should never be left free-standing that could be blown down by unexpected winds.
- If any wall is to be toppled by pulling, there should be a surrounding clear space of 1.5 x wall height
- Ensure temporary support props are in place to provide additional support where needed
Make sure you have the following documents completed and available for your demolition work:
- High-Risk Response Plan
- Task Analysis
- Standard Operating Procedure (SOP)
You can find these in your Templates Library in your Hub. You can login to your Hub here.
These should be tailored to the task at hand and regularly updated as changes occur.
If you have any questions reach out to the HazardCo team
With HazardCo, you don’t need to be on-site to know what’s happening. At the click of a button, the HazardCo Hub will show you who’s on-site, and it’s all available to you at any time, from anywhere.
It all works using a QR code:
- When you create a new Project in the Hub, it automatically creates a site-specific QR code.
- Your site Hazard Board arrives with the QR code printed on it.
- Every time someone enters or leaves your site, they scan the QR code using the free HazardCo App then the App sends the info to your Hub.
- The QR code links activity to your project, and the details of who has scanned on/off site is stored in your Hub straight away, so you can see on-site health and safety activity as it happens.
Likewise, any H&S reports created on-site via the App are updated to the Hub straight away. This includes:
- Scanning on/off site, so you know who’s there at any time.
- Site inductions as soon as they’re completed.
- H&S reports completed by members of your team via the App e.g. Toolbox Meetings, Site Reviews, Risk Assessments, and Incident Reports.
- Any completed H&S activity shared by your subbies… yes, if they’re HazardCo members they can easily share their reports straight from the App into your project on your Hub.
The QR code is the link between all on-site H&S activity and your project in the Hub. When you get everyone on-site using HazardCo’s digital system, you’ll always have a real-time view of the activity happening on your site, even when you can’t be there yourself.
With the HazardCo App, it’s as easy as picking up a smartphone to stay on top of on-site health and safety activity.
There are two key parts to the HazardCo system, the Hub and the App:
- The Hub is your record of everything and everyone in one place – your online tool for managing and viewing H&S across all of your projects.
- The App puts H&S in the palm of your hand – and everyone else’s hands on-site too. App Users in your Hub use the App to complete H&S activity for your site, following the straightforward guides and forms to ensure they’ve ticked all the boxes when it comes to identifying and managing H&S risks. And everyone else on-site including contractors and visitors, scans on and off site and completes site inductions with the HazardCo App – simply scanning the QR code on the HazardCo Hazard Board.
As the business owner, a lot of responsibility for H&S sits with you. However, with HazardCo’s digital system,you can add key team members to your Hub as App users, meaning any one of you can use the App to complete on-site H&S activity and those day-to-day tasks can be delegated or shared with others. All completed activity lands back in the Hub under your Project Overview, which you can review from anywhere and at any time.
The App features all of the key H&S activities you should be doing on-site, including Risk Assessment, Site Review, Toolbox Meeting, Vehicle Checklist, or Report an Incident. What’s more, if your subbies are also HazardCo members, they can use the App to scan onto your site and share any of their completed H&S activity directly to your Hub using the QuickShare feature on the App.
Learn more about all of the features on the HazardCo App and see just how straight forward it makes H&S for you and the team… this video overviews the HazardCo App, showing you all you need to know. Nothing beats the feeling of confidence you’ll get from being a HazardCo member.
Are you aware of when you need to notify WorkSafe NZ of your particular hazardous excavation works?
Conducting any of the following excavation works will mean you’ll need to complete this WorkSafe NZ online notification form:
- Work in any drive, excavation, or heading, in which any person is required to work with a ground cover overhead
- Work in any excavation in which any face has a vertical height of more than 5 metres and an average slope steeper than a ratio of 1 horizontal to 2 vertical
- Work in any pit, shaft, trench, or other excavation in which any person is required to work in a space more than 1.5 metres deep and having a depth greater than the horizontal width at the top
It is expected that at least 24 hours notice is given prior to commencing such excavation works.
Notifying WorkSafe of your intended works allows them to gather statistics on the number of high-risk works going on around the country, and plan their use of resources to promote the prevention of harm.
Make sure you complete a Task Analysis for your high-risk works, you can access Task Analysis Templates from the Templates tab in your Hub. This will help you to identify the hazards, and the controls needed to minimise the risk to not only those involved in the works but all those working on the site.
If you have any questions or would like to discuss your particular hazardous works please feel free to call our Advisory team on 0800 555 339, extension 4.
One of the most challenging parts of managing any site is the volume of subbies, contractors, and visitors on-site at any one time. Adding to this, each individual will bring their own thinking and commitment to health and safety, so it’s important as the site leader that you set the right tone from the get-go, harnessing smart and easy to use tools on the HazardCo App.
Because when your subbies all use HazardCo – everyone benefits.
Saving time on-site can help everyone get the job done quicker. With all your subbies using the same system, everything follows the same format, making it much quicker and easier to find the information you need, when you need it. There will be less time chasing everyone for paperwork, and site inductions can be completed by the subbie or their team members, on their own smartphones so it doesn’t take you away from the job at hand.
HazardCo makes this super easy with the QuickShare feature which lets subbies add their health and safety activity to your project on the HazardCo Hub. All at the touch of a button. Your subbies simply need their own HazardCo membership to enable this.
When your subbies are members of HazardCo too, it means no double handling – once a report or activity is created on the App it can be shared with you straight away. It’s easier for your subbies as they have clear and replicable forms on the App which they can share directly to your Hub… it all adds up to less time on paperwork and less visits to the site office. With the App’s time saving features all available in the palm of their hand, there are no excuses for not doing it, and your subbies don’t have to try and remember to ‘do it later’.
Perhaps most importantly of all, by sharing your information and activity quickly and easily, you’ll both be on the same page when it comes to health and safety for your site. This means you are doing the right thing by yourself and your wider crew.
Whether or not you believe in the well-known phrase, “the customer is always right”, there is no doubt that the customer or client plays an important role in the success of your job.
One way to give them confidence and make those day to day conversations easier is to demonstrate great health and safety management whenever they’re on-site. Using HazardCo’s smart App and online health and safety system, it’s easy to stay on top of site health and safety, and you always know who is on-site in real-time.
Most clients will be inexperienced when it comes to building and site management, and some will want different levels of involvement and visitation to site. By encouraging site visits, you can ensure there are no surprises for your client, and as the project progresses you can manage expectations or discuss changes as necessary. In most cases, this is a significant financial investment for the client – meaning stress and worry can be high, so take the stress out of health and safety using HazardCo’s smart online tools.
Clients should be accompanied whilst on-site. Getting your client to use the HazardCo App to scan in and out of site for each visit, will help you keep health and safety top of mind for them too, because as much as they own the property, you own the construction site. It’s an important reminder that everyone is responsible for health and safety, including the client. This includes being responsible for ensuring the safety of contractors and team at work, including ensuring all projects have a Site Specific Safety Plan and Hazard Board.
Many clients will be unaware that they also have health and safety responsibilities, so share this with them, and show them how HazardCo’s clever system helps you cover all of the bases. This will give them peace of mind that you are on top of site health and safety, giving greater confidence in a successful job.
It’s important that these expectations are established at the start of any job. Meeting with your client to discuss timing for site visits, and frequency on-site. The same rules should apply to them as any other visitor, including receiving a site induction, scanning in and out of site every time, dressing appropriately, and checking the hazard board.
By bringing your client on your health and safety journey with HazardCo, you will be in for a five star review, giving them peace of mind about the job.
If you have any questions reach out to the HazardCo team today!
Here at HazardCo, we always want to be better, and the HazardCo team has been working hard to deliver the latest update which focuses on the scanning in and out feature on our HazardCo App.
Taking onboard feedback from our valued members, our new App update makes it even easier to get everyone using the free HazardCo App to scan in and out of site, each and every day.
What’s changed?
Your team and wider crew won’t have to enter their details every time – just the once, saving them more time so they can get onto the tools.
Scanning into site if it’s your first time on-site
The first time anyone scans into any HazardCo site, they will need to enter their details and complete their site induction. If they already have a HazardCo account, their details will be pre-populated.
Every time after that
For any site that they have visited before, they won’t be asked if it’s their first site visit as the App will remember them and their logged details.
The App will now ask you to contact your site supervisor if your responses aren’t satisfactory e.g. if you are showing COVID symptoms.
The updates to the App are here now, so if you don’t allow automatic App updates on your smartphone, you’ll need to update the App from the App Store or Google Play. Easy as that.
Lastly, tell everyone! Your next Toolbox Meeting is a great time to get your team and subbies to update the HazardCo App on their smartphone and remind them to scan in and out of site, every time.
Simply scanning into site gives people a useful daily reminder to beware of health and safety – and we all know the more we think about it, the more we look out for and prevent risks. Getting everyone doing their bit shares the load when it comes to health and safety on-site. It’s a win-win!
If you have any questions get in touch with the HazardCo team today!
Looking for something in particular?
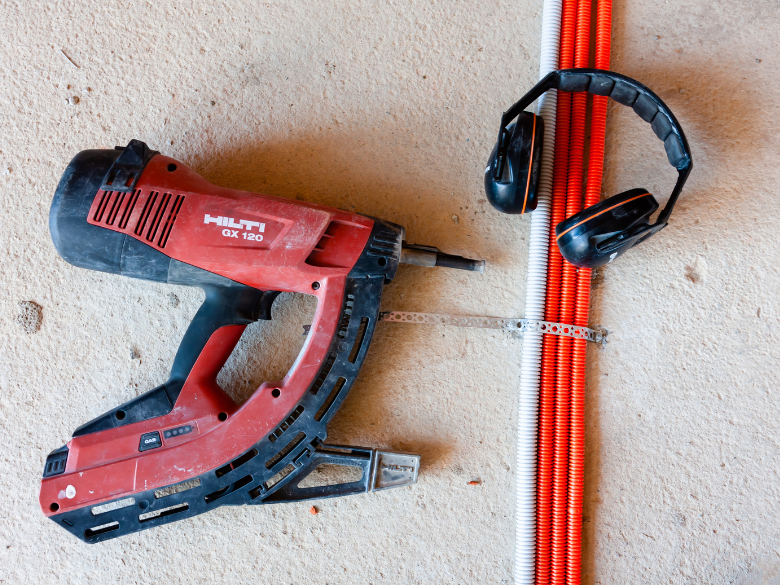
Nail guns are common tools on residential builds. Like any power tool, they can cause serious injuries if not used properly.
Most injuries happen when the gun goes off while being moved or ...
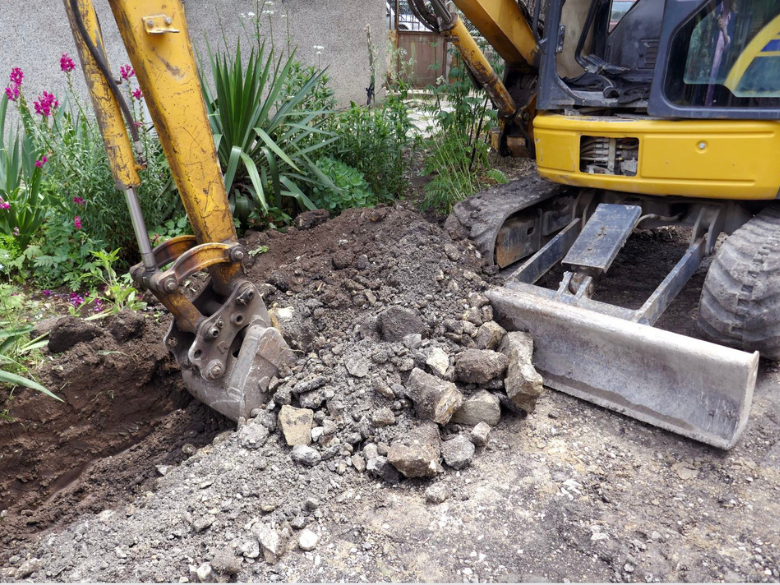
Excavation work means moving or removing soil, rock, or other materials with tools or machinery. You’ll come across it on most construction sites whether you’re building a new home, putting in...

Summer’s here. Are you ready for the heat?
Longer days and sunshine make it feel like the perfect time to crack into work. But while summer brings good vibes, it also brings its own set of ri...

Kick off the New Year safely on site
The holidays are done and dusted, and it’s time to ease back into work. Reopening your site is just as important as shutting it down properly and the New ...

The Christmas break is nearly here. You're probably counting down the days until you can relax and spend some proper time with the family and friends.
But before you lock up for the holiday...

Good health and safety isn’t about stopping work, it’s about having simple, clear processes so everyone understands how to get the job done safely.
When you plan the work and manage the ris...

The hidden danger on-site: Silica dust
Construction sites come with plenty of obvious hazards but some of the most dangerous ones are the ones you can’t see. One of those hidden risks is res...

Slips, trips, and falls, don’t let them take you down!
Slips and trips might seem harmless, but on-site, they’re one of the biggest causes of injuries. A bit of ground clutter, a wet floor,...
Your business is only as strong as your people. When workers get injured or struggle with stress, everyone feels it through missed deadlines, extra pressure, and lost skills on-site.
The go...

Got lone workers on your team? Here’s what you need to know
If someone on your team is working by themselves without other people around and without direct supervision, they’re likely conside...
Take the Hassle Out of Toolbox Meetings
Toolbox meetings don’t need to be a paperwork mission. With the HazardCo App, you can run quick, focused chats straight from your phone – No prep, no p...

Get your team scanning in and out – it’s a no-brainer!
We get it, health and safety chats aren’t always the most exciting. But they are the most important. When everyone on-site takes part,...


